Posts

Showing posts from April, 2017

The Big Eye Camera:Testing with Negatives

Image
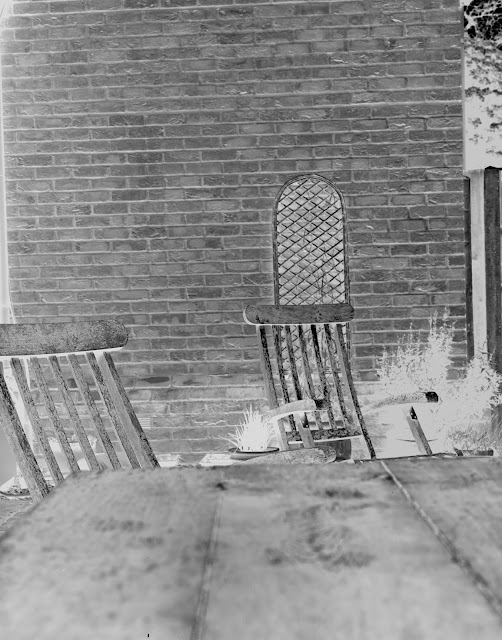
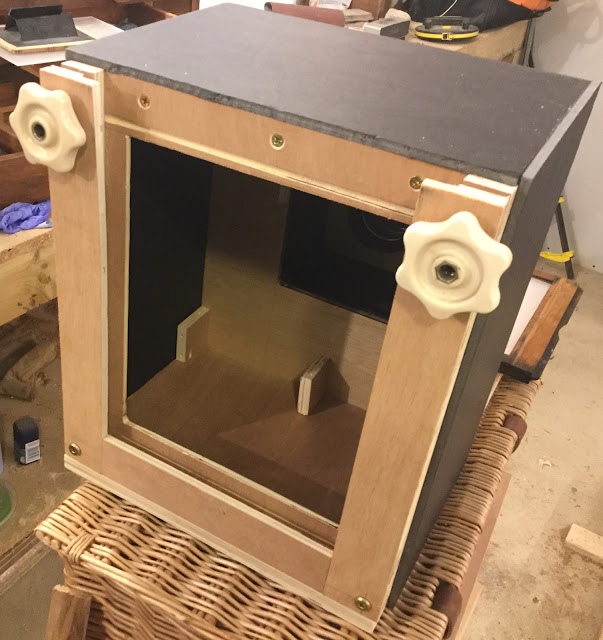
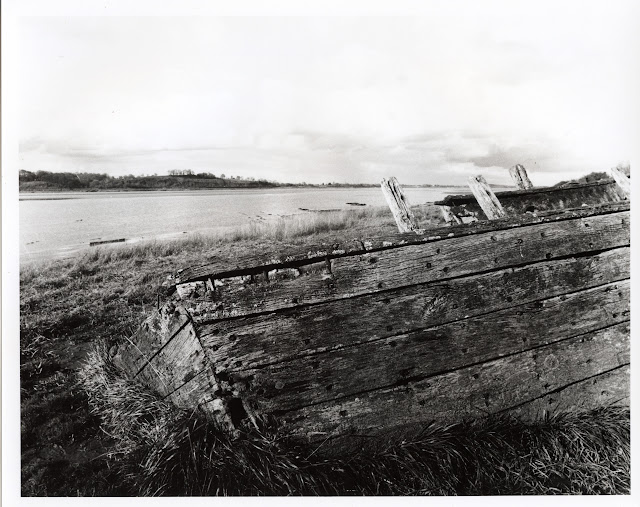
Previous posts showed how I built and tested my 8x10 camera. Ugly but it so far works quite well. I have more work planned for it (blackening the interior, adding a landscape mounting, shutter etc) For now I wanted to try real film. As mentioned before 8x10 film is expensive which is why people often use paper negatives or ortho lith film for economy. Silverprint had some Fomapan 100 8x10 on sale so I got a pack of 50 sheets. Fomapan is popular because it is so economical. It has trouble with being contrasty and it has very high reciprocity failure so is difficult for long exposures. Many people like it in fact and I have learned recently how to tame contrast in film. I took two photos in my back garden. The first I focused on the chair back and the second the brick wall. I wanted to see about depth of field. I metered the scene at ASA 80 to help with the contrast I would give a slight over exposure and then under-develop the film. Both shots were the same exposure 1/2 sec at f45.

Paper Negatives Revisited

Image
I first explored paper negatives when I wanted to print a color slide and needed to create an inter-negative in this post . I have since made an 8x10 large format camera and made paper negatives to test it.   Andrew Sanderson at thewebdarkroom has written a nice treatise on the paper negative and I highly recommend buying it. It is available on Blurb . Andrew's book introduced me to new ideas about paper negatives. Surprisingly for me he moves beyond contact prints and suggests loading paper in a medium format or 35mm camera. This can then be put in an enlarger. The result while not as crisp as a film negative has its own quality that he shows suits some subjects. I was inspired to try this out. Some time ago I found a good price on ebay for a rolleiflex/cord back that takes dark slide glass plate holders along with 4 plate holders. At the time the price was negligible and I  thought it might come in useful if I got into making glass plates. It sat in the shelf for some tim

Galaxy Direct Positive

Image
I had joined the original Galaxy Kickstarter campaign for direct positive paper and bought a pack of 8x10 paper. I generally support new film activities (for instance I also support the Ferrania Film Project as well.) It turns out Galaxy convinced Slavich to repackage their photo-booth paper into larger formats and perhaps reformulated the reversal chemistry. As annoying as the website is I think it is all to the good that they are generating interest and support in traditional photography. The biggest complaint I have is there is very little technical information about the product and as such one is reliant on their chemistry which is fine but never seems to be in stock at least in the UK. (This seems due to some restrictions on shipping some of the chemicals in Europe.) Having a 8x10 large format camera now I want to use the paper so I suppose I need to create my own reversal chemistry. Reversal is a clever process used in slide film and black and white and colour movie st

Kodak XX Film for the Minolta 16mm spy Camera

Image
After a failed attempt to use old Russian 16mm film I decided to get new stock and after perusing ebay and reading up on B+W film the obvious choice was Kodak XX (Double X) 7222 16mm movie film. It  is a proper negative film and has a fan base that admires its speed (200 in Tungsten and 250 in daylight) even tones and low grain. 100 ft (a lifetime supply for my purposes, About 1300 photos.) set me back £42. The subclub  has tons of resources for these small cameras. The loading for Minolta cartridges is covered here . I loaded about 8 inches into one of my film cartridges and took some quick test photos with my Minolta 16PS. I shot the photos at ASA 200. I developed the film according to Massive Dev chart in my normal film developer Ilford LC29. The timing for this development was for ASA 250. For properly metered shots the negatives came out well balanced. Scanning 16mm is difficult as I don't have a proper holder and I could not locate the small glass plate I use for this.

The Big Eye: Portrait Test

Image
I wanted to run some more tests and settled on a portrait (myself) for a subject. I set up the Big Eye in the driveway and would use the sunny day to keep the exposure reasonably short. I would use my Ortho Lith film as I did in a previous post  and try and adjust for what I learned. I rate the film at ASA 3 this time and a metered exposure at f45 called for 2 seconds. My wife ran the shutter. I developed it in HC-110 1+165 (6ml+994ml water) for 14 minutes. I got this on the film. UltraFine Ortho Lith Negative A print revealed something workable. However the strong sunlight and Lith film makes it high contrast and the background is completely black being entirely in shadow. I used only a #0 filter given the high contrast of the negative and exposed for 23 seconds for good density of black. Final Print f16 #0 23 sec Ilford MGIV Deluxe

Ultrafine Ortho Lith Development

Image
Having built an 8x10 camera I am now exploring making images. The great expense is the cost of film. Below are some examples...per sheet! Ilford     FP4+/FP5+     £5.20 Ilford     Delta/Ortho+  £5.50 Foma     100                  £1.90 Foma     200                  £2.90 Fuji        Provia             £17.50 (Colour) Ultrafine Ortho Lith     £1.15 Ultrafine Continuous Tone £1.20 Some reading reveals that in addition to paper negatives (use of photo paper for negatives) another cheap alternative is ortho lith film. Like paper is it insensitive to red light and this renders the same problems/effects one sees with paper negatives like white skies as it is very blue sensitive and darkened reds. It is also comparably slow (hence ortho). It is also very contrasty being made to render high contrast text and graphics. I had some 8x10 Ultrafine Ortho Lith I bought for other projects. I had to read up on how to tame the contrast and also needed to find a good ASA to use. Photo Wareho

The Big Eye: A DIY Large Format Camera

Image
What have I gotten myself into? These are my thoughts after completing another project today. Do I really need this? Was this a project for the project's sake? Or perhaps I found myself enthralled by the romance of a truly large camera. Well anyway this is how I got here... I had managed to collect a number of cheap components and a couple of weeks ago I realized I was close to having a large format camera. I had bought a 300mm f5.6 Rodenstock Rodagon lens for £18.60+£6.00 shipping because I couldn't pass it up about a year and a half ago when I was thinking of making my own 4x5 enlarger (I know way too big a lens for 4x5). I also bought a 5x5" bellows in good condition for £18.00 for the same project. Finally I saw a few weeks ago three 8x10 dark slide film holders for £75. The seller threw in a fourth decrepit one which was fortunate. A subconscious plan had developed with this third purchase. Build a large format camera. I spent a two weekends putting it together.

Thin Negatives

Image
When my father was in hospital for open heart surgery at the Cleveland Clinic I took out some time one afternoon to look around downtown Cleveland. I took the bus down and brought along my Gevabox 6x9 box camera. I had nice walk around took a number of photos. The Gevabox only has a couple of apertures and one shutter speed. I found a mural on a building of a cowboy and cattle herd. I was across the street and the light was poor being in a shadow between buildings. After I developed the film in my hotel the negative was disappointingly thin. Indeed so thin as to almost not hold an image. Here is scan of the negative. I know... not much to see here. . I tried to print it but it was very difficult. Very little contrast it was a disaster. Recently I was reminded in some reading about intensifying negatives, Now you can buy commercial intensifier based I think on Chromium and since I had none is why I hadn't tried it. However I learned there are other methods using Sulphide

The Purton Hulks

Image
At the end of a recent holiday we visited with some good friends who live in Stroud. They took us out to visit the Purton Hulks along the Severn River. This is a place where old ships were placed along the bank to shore it up against erosion. It was a nicely cloudy day and we all took cameras and took some photos. Here is one of mine I printed in different ways to explore contrast and light. To start with I used just a #5 high contrast filter. f16 #5 16 sec The sky was washed out so I burned it again with just #5 filter. This gives a brooding dark sky though the day was not like that at all. f16 #5 16 sec burn sky 11 sec A little less burning off the sky gives a closer approximation to the day. Again only #5 filter was used. f16 #5 16 sec burn sky 8 sec Next a little low contrast #0 filter was added. But the sky is not well resolved. f16 #5 11 sec #0 4 sec And finally a conventional print. f16 #5 11 sec  #0 8 sec

Negative Development

Image
As I learn my way around film photography and the darkroom I have been frustrated with difficult to print negatives. I think this revolves around having negatives with too much contrast. I have come to understand through reading and practice that a high contrast negative is not a good thing. That contrast should get introduced during the printing. Contrast means many things but I think in this context it means the dark areas of the negative (highlights in the print) are very dense or black. The shadows (the light areas of the negative) are very clear. Of course the trouble with this is there is very little in between. I think of this in terms of information but also gain or slope of a curve. As I have posted elsewhere if one takes a high contrast negative one has a very steep gain curve. (Sorry I am an engineer by training so this is a bit mathematical.) The graph below attempts to illustrate this. A high contrast image has a very steep light curve. That is a small change in light