Posts

Showing posts from 2017

Another Enlarger Enhancement

Image
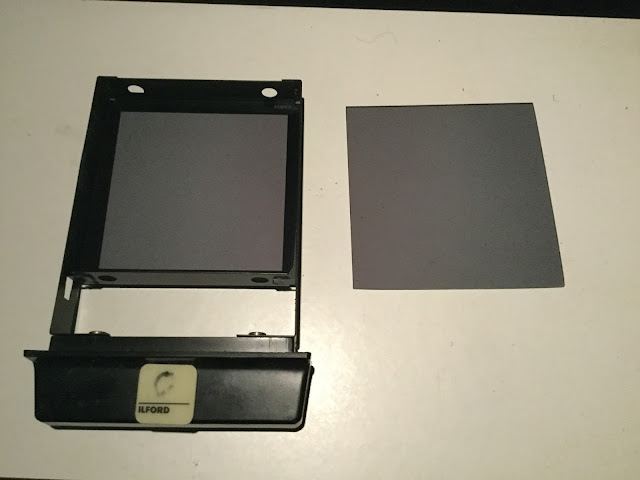
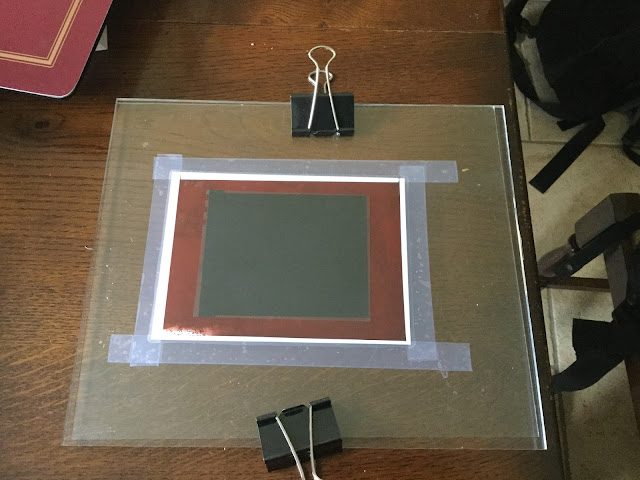
I have been steadily modifying my Meopta enlarger that I bought for £15.00. I started with raising it up to allow larger prints. Then I upgraded the lenses as I saw I was losing sharpness on the edges. Then because I wanted to stop down the lens for better sharpness I changed my 75 watt bulb to 150 watt. More light helped immensely with exposure times with stopped down large prints. On the other hand  smaller prints suddenly became challenging as I could not stop the lens down enough and I kept running into sub-8-second exposures even at f22. Though I have automated my enlarger  and that makes the short exposures accurate, there is not much time for dodging and burning. Finally I decided I could improve the setup using the now unused filter drawer. Since my automation project uses below-the-lens filters the filter drawer is unused. I bought a pair of single stop ND filters (Cokin P Series P152 0.3 ND2 - 1 Stop Neutral Density Filter) and carefully cut them to fit the filter drawe

Ferrania P30 Alpha Test

Image
I joined the original Kickstarter Campaign for Ferrania . The journey has been long waiting for the rewards. I joined as a means to support any effort for film photography. Thus I am happy to be asked to buy their interim product; a black and white 35mm film based on the formula for Ferrania's historical P30 movie film.  This was meant to to be a pipe cleaning exercise for the resurrected factory. I am not a big fan of 35mm and prefer medium format. The original rewards were to be color reversal film in different formats including medium format. About a month ago I finally got my film and today got around to processing it. I decided to follow the process outlined in my previous post here . I made a roll of test exposures on my Olympus OM1 metered separately with a digital light meter (Sekonic) at ASA 80 box speed. I exposed +/-1 and +/- 2 stops and nominal tests. I developed in D76 stock at 7:00 minutes 20 degrees (compensated for 24 degree developer temperature) according to the

Salt Print on Old Photographic Paper

Image
In previous posts I explored using expired 4x5 film emulsion as a basis for making salt prints. I reasoned that if better results were had with sized paper then it should be possible to use expired film as 'sized plastic'. This worked though it is difficult to achieve consistent results. I then extended this to expired photographic plates and achieved some success there. The next 'frontier' is to apply the same techniques to expired paper. Preparing the Paper Again I took a few full sheets of ORWO black and white paper and fixed it for 5 minutes in rapid fixer.  Then I washed for 10 minutes as one would a developed print. The point of all this is to remove all the silver from the emulsion. I then dried the paper thoroughly. Salting the Paper Next I immersed the paper in salt solution for about 10 minutes. Previous work with film found that insufficient time in the salt solution levels the result insensitive as the salt has not fully been absorbed into the gelat

Salt Prints on Expired Glass Plates

Image
Glass Plates In a past post I explored salt prints on expired 4x5 film. I thought this technique should apply to old glass plates. I had experimented in the past with glass plates in the darkroom to various success. I had some old Air Ministry plates from the Second World War which were fogged nearly to blackness. These would be good candidates for experimentation. Air Ministry Plates Box Clearing the Plates My first attempt resulted in a lot of learning :). I soaked the plates in fixer for about 5 minutes until all of the milky emulsion turned clear. I then washed and scrubbed the green anti halation dye from the back of the plates. I then set them out to dry. Salting the Plate My first attempt at this was to wet the plate thoroughly with my 2% salt solution with no citric acid. More reading indicated perhaps sodium citrate but not citric acid. I did this with a small piece of sponge giving what I though was ample time for the salt to soak into the emulsion. I then dried

Salt Print Transparencies on Expired Film

Image
Always interested in trying something new I decided to try salt printing the predecessor to black and white film photography. I did the usual perusal on the web A Dash of Salt - Alternative Photography   St Paul's Photography-You Tube How to make salt prints – the video - Alternative Photography  And many other articles a Google away. Basically salt (kosher or sea salt as we shall see later) and silver nitrate. Citric acid is helpful. While reading about traditional paper-based prints one sees an emphasis on using sized paper. Now sized paper typically means a gelatin (or other material like arrowroot) coating. The sizing allows the silver image to sit on the top of the paper fibers rather than in them. This is seen as producing a sharper image. Some however prefer the un-sized paper as they like the depth of the image. In reading this it occurred to me that photographic film is really just sized plastic film. I have a few boxes of expired 4x5 film. I thought I should

Black and White Print from a Color Slide

Image
I was scanning some of my brother's 35mm Kodachrome slides from a backpacking trip he did many years ago in the Mazatzals in central Arizona. I was struck by one photo of some Manzanita bushes and thought that would be good to print in Black and White. The slide is below. I would need to transform it from a color positive to a black and white negative. I have done this before with a paper inter-negative but settled on a film inter-negative which I have done before as well. This time however I decided to try a different method of creating an inter-negative. The slide is 35 mm so I figured 6 x 4.5 cm would be a close enough fit for aspect ratio. I didn't want to deal with roll film as I would get committed to an entire roll of film. I can also get four of this size negative from a sheet of 4x5 film. So I started with some Fomapan 100 film which I cut to the 5x4.5 cm size pieces. I mounted the slide in the enlarger and adjusted it to focus as a 6 x 4.5 sized image. Th